Your server is now equipped with the latest version of macOS*. Time to start sharing.
*This was written in 2023, so the instructions may vary for later builds of macOS.
Now macOS has been reinstalled from scratch, it’s time to set it up. The following instructions are for Ventura only; older builds will require you to navigate System Preferences instead. Start by opening System Settings and navigating to General > Software Update to verify everything’s up to date. As your server is going to be unattended for long periods of time, you may want to change the Automatic updates setting so macOS updates and any App Store updates are installed automatically – however, if you installed macOS through OpenCore-Patcher, leave things as they are – you’ll need to install these manually via ‘Post-Install Root Patch’ in the app.
Next, lets configure your server to act as a sharing hub. Most of these settings can be found under General > Sharing. Start by allowing other devices on your network to connect to your choice of shared folders by flicking the ‘File Sharing’ switch to On. Now click the ‘i’ button next to it to choose which folders to share (external drives are automatically shared by default) and to restrict access by username and password. If you plan to access your server from Windows PCs, click Options to verify SMB sharing is enabled, plus take note of the Windows File Sharing warning. Try connecting without ticking this box – leaving it unchecked is better for security but may be impossible.
File Sharing is where you can also set up a folder on your server as a central Time Machine backup location for all Macs on your network (it goes without saying you should make sure you have a drive large enough to accommodate all your networked Macs’ needs). Click + under Shared Folders to pick the folder you wish to make accessible. Once in place, right-click it in the Shared Folders list and choose Advanced Options… and tick Share as a Time Machine backup destination. You can also set a backup limit (500 GB is the default) to prevent one person hogging all available space.
If you have a non-networked printer, a good way to share it with others is through your always-on server, so after connecting and setting it up via USB, flick the Printer Sharing switch on. Click ‘i’ only if you want to restrict access to the printer.
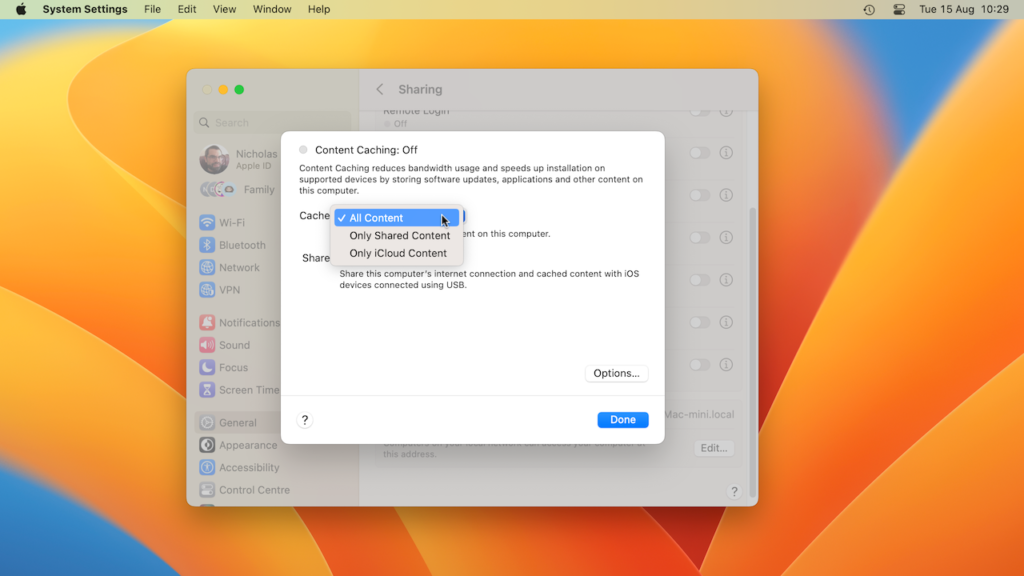
Elsewhere, ‘Internet Sharing’ allows others to connect to the internet through your server, while ‘Content Caching’ is useful if you have two or more Macs on your network as it speeds up the downloading of updates, iCloud files and other Apple-related content.
5 best add-on services
It’s time to add some meat to your new server. The following can all be installed natively on your Mac to provide a hub for other networked devices – computers, mobiles and more – to connect to shared content and services. Other services can be added using a tool called Docker – click here to find out how.
- Jellyfin
https://jellyfin.org
One great use for a server is as a streaming service for all your owned media. If you’re looking for a well-rounded server that’s completely free to use, then Jellyfin offers a slick experience and wide client support. - Tailscale
https://tailscale.com
A popular use for a server is as a VPN server, which allows you to dial in to your home network securely when on the road. The free version of Tailscale allows you to set up a fast and secure Wireguard VPN server easily. - Calibre Server
https://calibre-ebook.com/
If you’re already managing your eBooks using the brilliant Calibre, why not move it on to your server, then make use of its Content Server to give you access to your books through any web browser on your network? - Syncthing
https://syncthing.net/
Syncthing is designed to keep data synced between two or more devices in real time. It’s perfect for large folders (say media files) that you want to back up without having to burden your Nextcloud installation. - Duplicati
www.duplicati.com
Looking for a safe way to back up your server data? Duplicati works with a wide range of cloud storage providers, but lets you add an extra layer of 256-bit encryption to keep your backups beyond the reach of bad actors.
How to set up your server for headless access
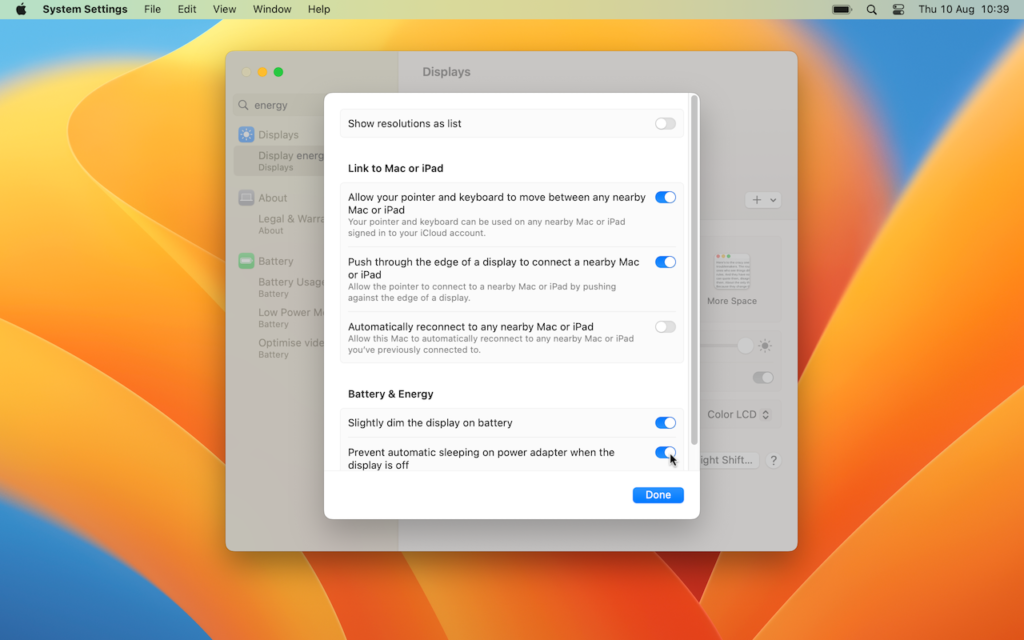

1. Disable sleep
Open System Settings > Displays and click Advanced… Flick the ‘Prevent automatic sleeping on power adapter when the display is off’ switch to On to keep your server awake when you close the lid or switch off the display.
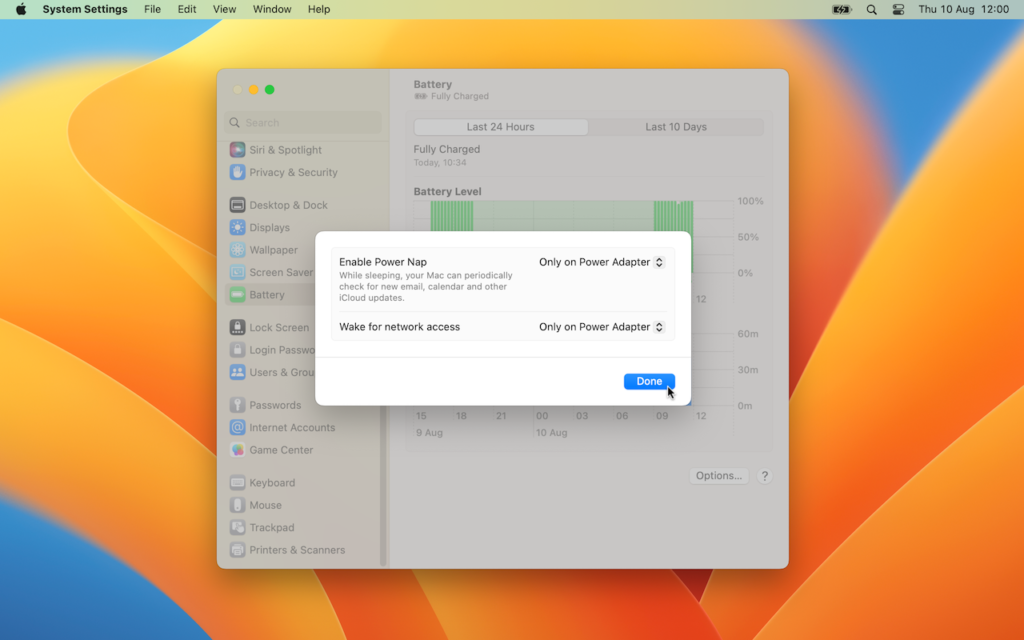
2. Set wake options
Switch to Energy Saver (or Battery > Options… on a MacBook). Make sure all settings are either on (desktop Mac) or set to ‘Only on Power Adapter’ (MacBook). This should prevent issues when in energy-saving mode.
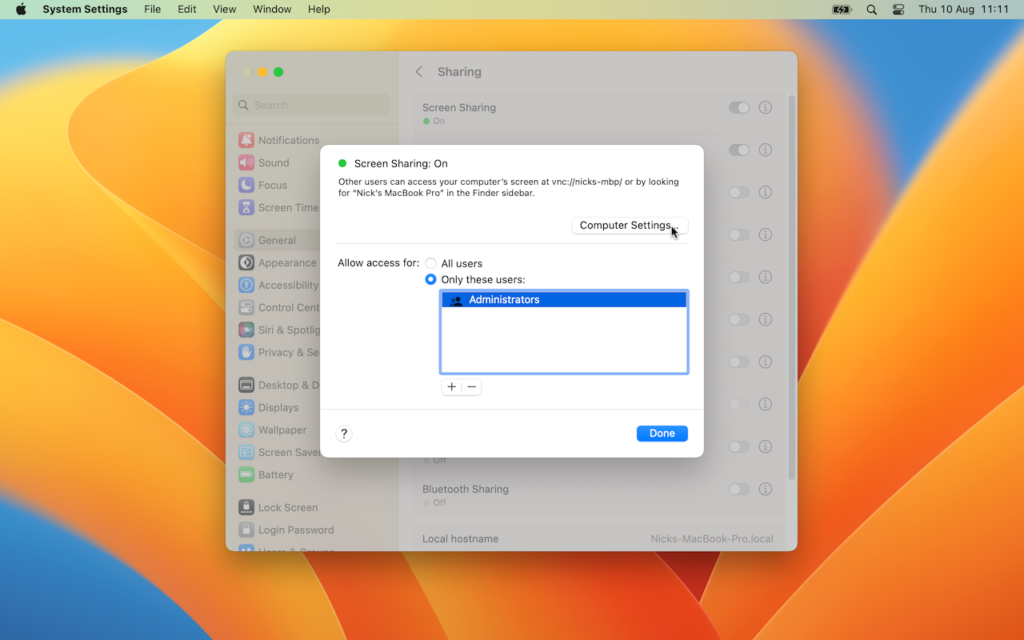
3. Set up screen sharing
Now switch to General > Sharing. Flick the Screen Sharing switch to On, then click the ‘i’ button. Verify only Administrators have access, then either click Computer Settings to configure access on non-Macs or click Done.
4. Test connection
Switch to another Mac on your network and open Finder. Either click Network in the left-hand pane or choose Go > Network. Your Mac server should be visible. Double-click it and then click the Share Screen… button.
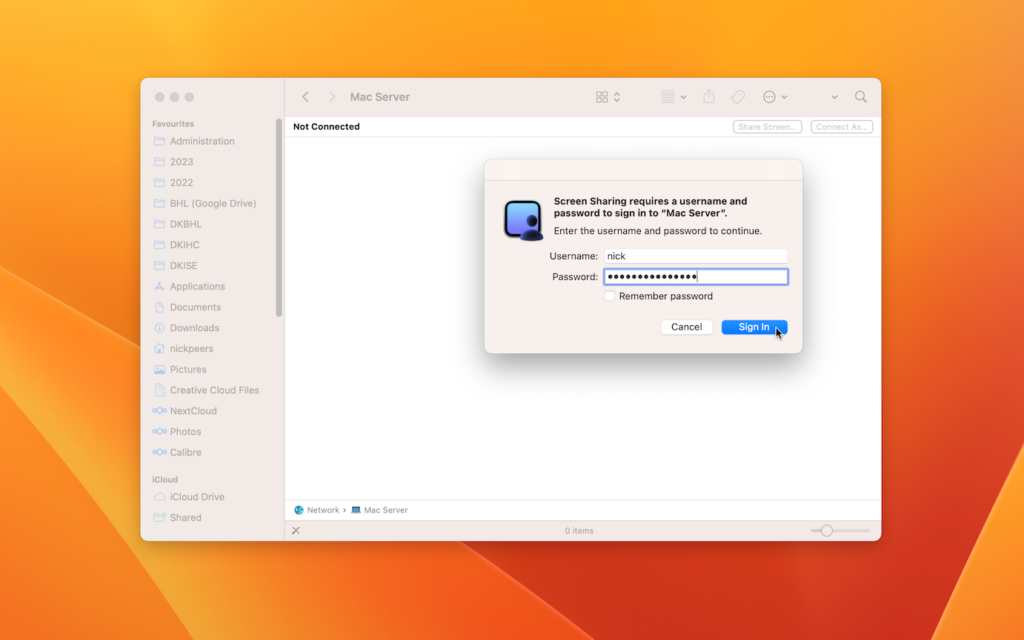
5. Enter password
Enter your Mac server’s username and password and click ‘Sign in’ – we don’t recommend ticking ‘Remember password’ for obvious security reasons. You’ll be presented with a screen showing your server’s desktop.
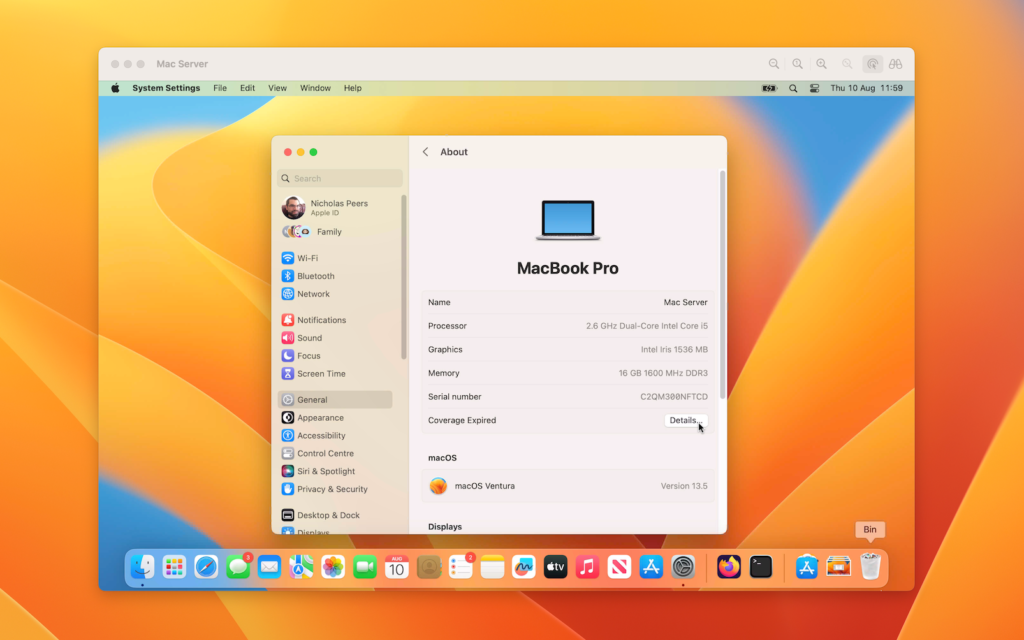
6. Administer remotely
You can now manage your server as if you were sat directly at it. You can now disconnect any keyboards, mice or external displays, or shut the lid of your MacBook and control it from your main Mac going forward.