Step one: wipe your old Mac clean and prep it for its new role.

First, you need to prepare your old Mac for its new role. The best Macs for the job are the Mac mini or an old MacBook, as neither consume large amounts of electricity, so can be left running 24-7 for always-on access. Start by powering up your Mac and choose About this Mac from the Apple menu to review its current specs. Check out the box opposite for potential upgrades to consider – we recommend 8GB RAM and a fast boot drive (either SSD or hybrid), plus an Ethernet port to connect direct to the router for maximum network performance. Visit www.ifixit.com and search for your Mac by type and then model to see what guides are available and whether upgrading the RAM and/or boot drive are realistic options.
5 best hardware add-ons
Your server may be ready to go as it is, but consider these hardware upgrades to improve performance, expand your storage capabilities and give you an option for managing your server from the sofa if it’s connected to your TV.
- RAM upgrade: If your older Mac has just 4GB (or less) of RAM, investigate a low-cost upgrade to 8GB or even 16GB RAM. The more RAM you have, the more services you’ll be able to run concurrently without impacting your server’s performance. Use a site like Kingston to identify what RAM you need.
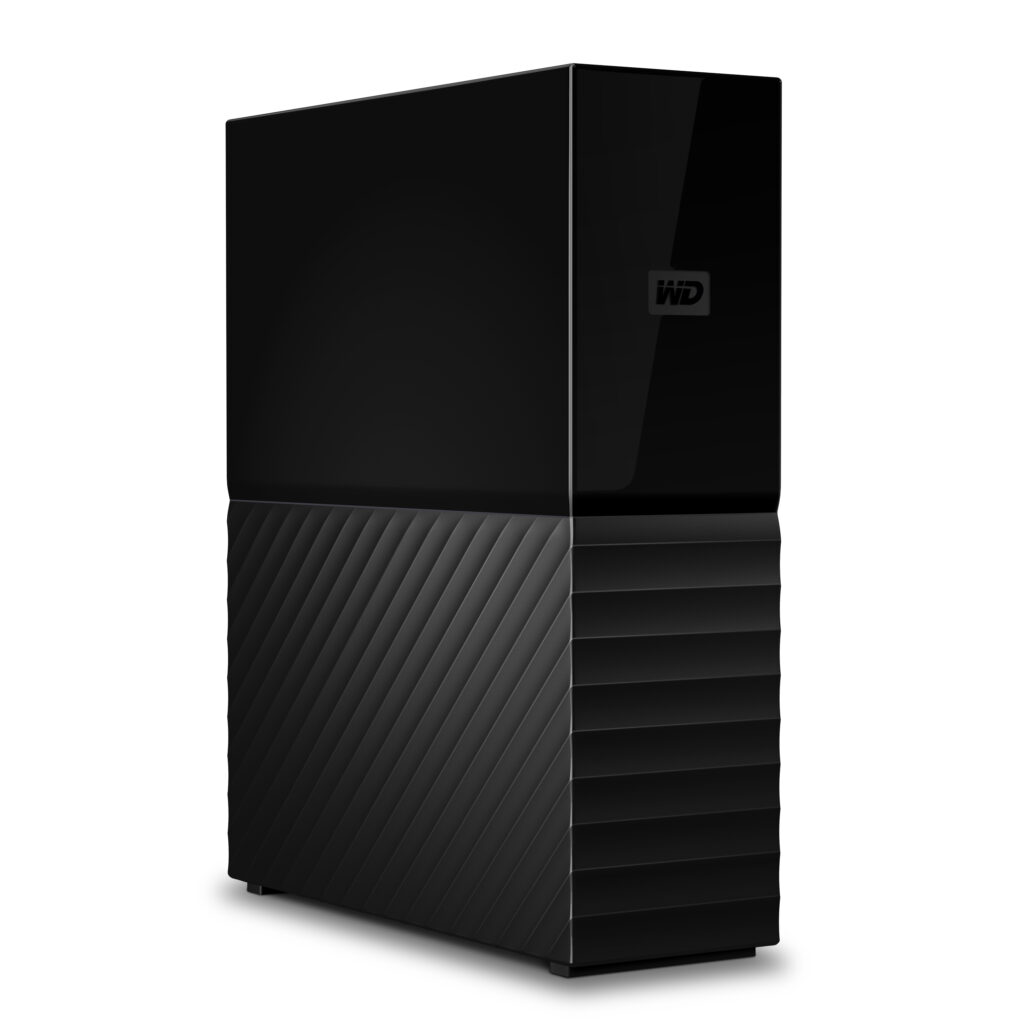
- Switch to SSD: If fitting a new hard drive is practical, consider upgrading a regular hard drive to a faster SSD model: again, Kingston offers a budget-friendly SATA SSD drive with a choice of 240GB (sufficient if you’re happy to store data on an external drive), 480GB and 1TB. Other manufacturers like Western Digital also offer similar products.
- External storage: Your Mac’s boot drive is sufficient for some services, but data-hungry ones like a media server require more. Choose USB 3.0 or better and remember that while portable drives take up less space, they’re usually slower than full-size drives.
- Wireless keyboard: If you place your server in the living room under the TV, you’ll want a wireless keyboard to allow you to manage it from the comfort of your sofa or chair. Logitech’s K400+ retails at £45, and also comes with a touchpad.
- USB Ethernet adapter: Ethernet is a much quicker (and more stable) connection than Wi-Fi, a must for any server. If your MacBook lacks an Ethernet port, you can pick up TP-Link’s USB 3.0-to-Ethernet adapter for £15 from the likes of Currys.
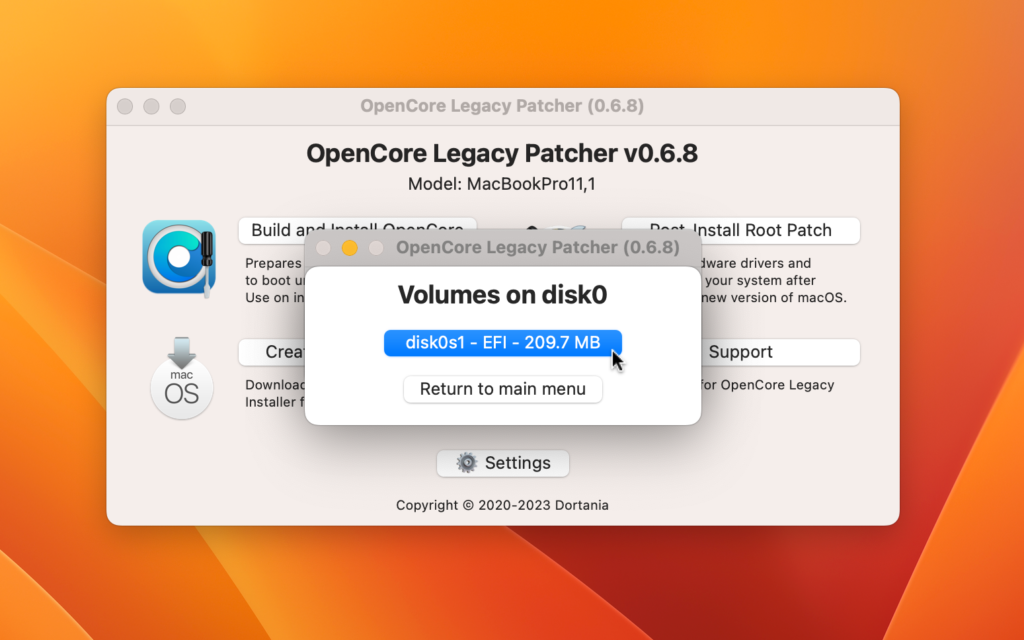
When it comes to your macOS install, we recommend wiping the drive clean to start afresh. It’s important you’re running a version of macOS that’s still covered by Apple’s security updates, which basically means macOS 11 (Big Sur) or later. If your Mac isn’t capable of running this build, or you’d like to future-proof your Mac, visit https://dortania.github.io/OpenCore-Legacy-Patcher/ for details of OpenCore Legacy Patcher, which can install macOS 11 (Big Sur) through to 15 (Sequoia) on many unsupported Macs. Once you’ve verified your Mac is listed, download the tool and follow the online guide to create your installation drive (16GB or larger flash drive).
The build process is relatively straightforward: first, if you’re creating the installer on your main Mac, click Settings to select your server’s exact model so the correct version is built. Then select which build to download (Sequoia in most cases, but earlier builds may be more stable on older machines). Once downloaded, you’ll be prompted to install the set-up tool to your choice of drive – make sure you pick your USB flash drive.
Once created, you’ll be prompted to install OpenCore to the drive: click Yes > Install to disk. Select your flash drive from the list followed by EFI partition and you’re done, ready to take the plunge. Before doing so, however, make sure there’s nothing on the drive you wish to keep – if in doubt click Ignore to quit OpenCore, then use a tool like the free version of SuperDuper to take a fail-safe backup of your boot drive’s contents.
With nothing of value left on your drive, now is the time to power it down and fit your upgrades if applicable. Once done, you’re ready to power up and install macOS from new for a factory fresh setup following the step-by-step guide below, then click here to configure your new server installation.
How to wipe your Mac clean and start again


1. Boot from USB flash drive
With your macOS installer drive inserted, press the power button and hold the Option key as soon as you hear the chime to start your Mac (or press and hold the button on a Silicon Mac) to bring up the startup menu.
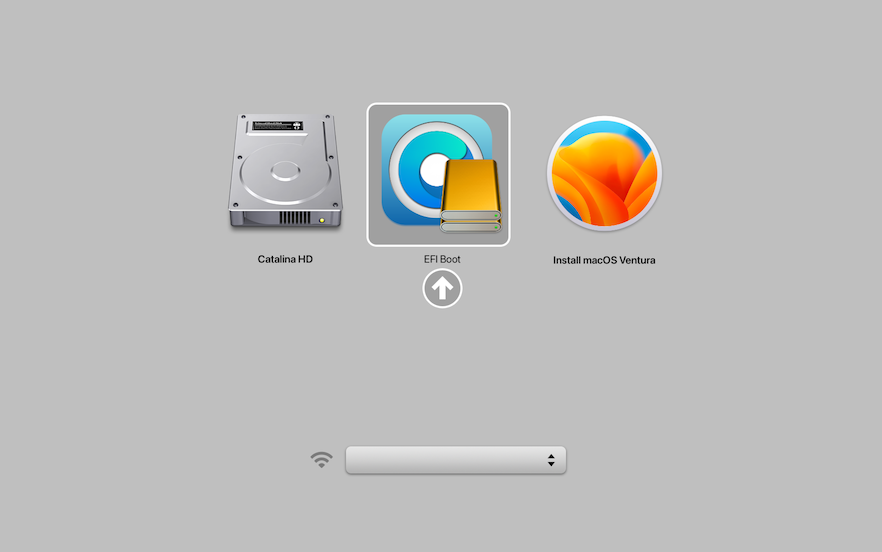
2. Boot to recovery menu
Hold Ctrl and choose EFI Boot when the option appears. Select Install macOS… at the next screen to boot from your flash drive. Wait while the installer loads. Eventually you’ll find yourself at the recovery screen.
3. Select installation drive
When prompted, select Install macOS… from the menu and click Continue, then Continue again when prompted. Agree to the license agreement and when prompted, select your internal hard drive and click Continue.
4. Deal with reboots
Wait while a fresh copy of macOS is installed to your hard drive. When your Mac reboots, be sure to select EFI Boot again if prompted followed by macOS Installer. You may need to do this several times, just keep at it.
5. Run through the wizard
After you’ve run through the setup wizard and arrived back at the desktop, open Applications where you’ll find a shortcut to OpenCore-Patcher. Open it and when prompted this time, install it to your internal hard drive.
6. Post-install setup
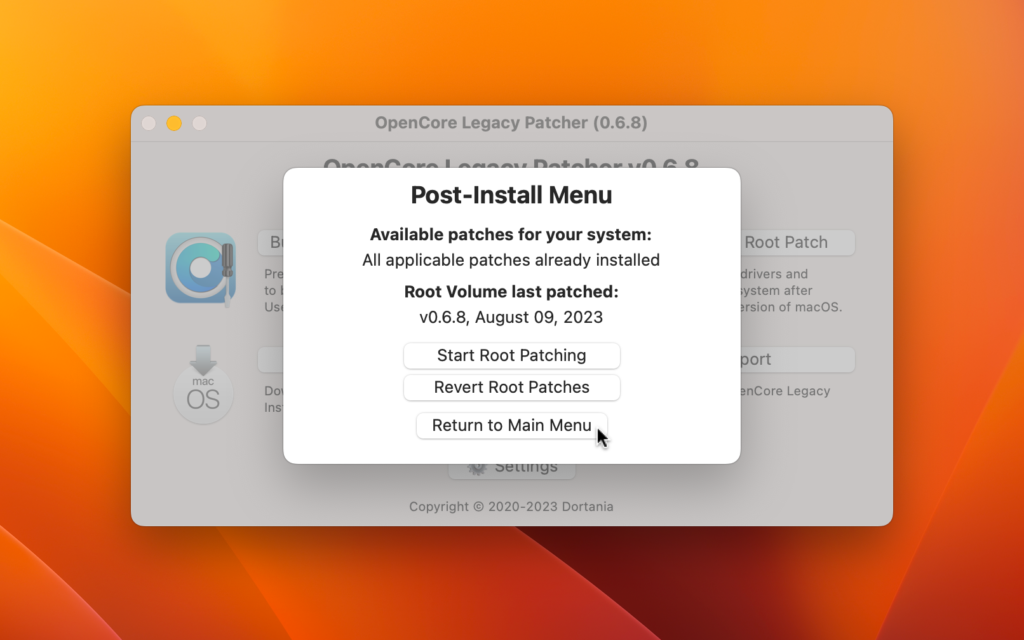
Remove the USB boot drive and reboot when prompted, choosing EFI Boot > macOS. Now open OpenCore-Patcher again and click Post-Install Root Patch to verify if any new patches are needed – install them if so.